
What is Arduino?
Arduino is an open-source electronics prototyping platform based on flexible, easy-to-use hardware and software. It’s intended for artists, designers, hobbyists, and anyone interested in creating interactive objects or environments.
Source: http://www.arduino.cc/
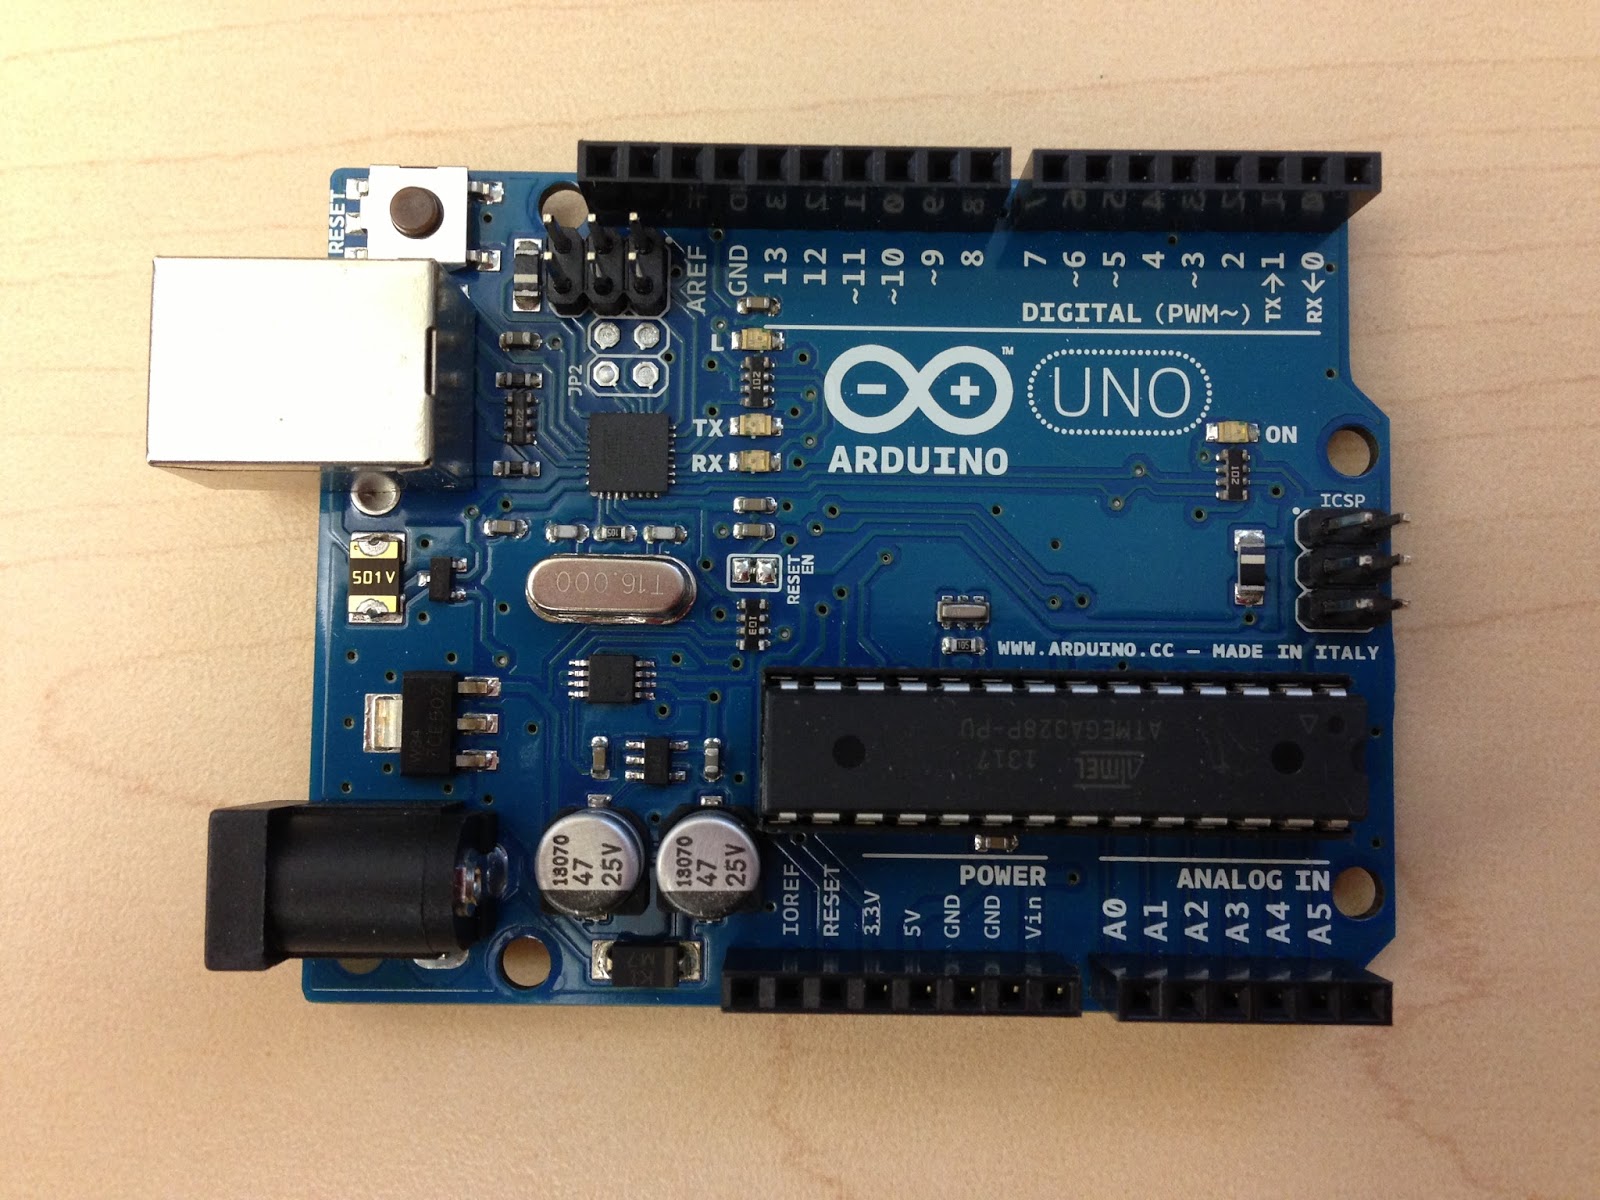
- It has a USB port for programming mine has a mini USB.
- A DC power jack. You can program and power up by using USB when connected it to your PC. Or you can use the power jack with external power supply.(please keeping mind that you have to use 7V-12V dc power supply as more than 12V DC is not recommended)
- There is a reset button, ISP programmer, atmega chip.
- There are two headers we called them as input and output pins and we can easily connect components to the the Arduino. The pin numbers are listed next to the headers on the board in white.
I am going to use Arduino Uno for most of my projects and tutorials. And you are free to use any of the other Arduinos out there and most of them will be fine for this tutorial. And the
other thing is that you no need to buy an official Arduino itself, since it is
open source and there are many cheap clone versions readily available. Or even you can build it on your own.
Download Arduino Software
You’ll need to download the Arduino Software package for your operating system from the Arduino download page. You can download ether the ZIP file (installation not required) or you can install it in to your computer.
When you open the application you should see something like this:

The Initial Setup
First thing you all need do is to setup the software other wise it want work properly.Go to Tools menu and select Board and select the type of Arduino you are using.

Programming Arduino
For this tutorial you’ll only need the Arduino UNO R3 (or any other version) board itself and a USB cable to transfer the program from your computer to the board.

There is an onboard LED to the left of the Arduino logo, a small SMD LED with the letter L next to it.
We are going to write a code to switch it on and off for one seconds at a time and then we will see how to make a double blink.
When you first plug your USB cable in to your Arduino and your computer, you may notice that this LED is blinking. It is the default program stored on the chip and we are going to override that program.
The USB cable powers the device. After you program Arduino it can run standalone by using a power supply in the bottom left of the board and do not require it to be constantly connected to your computer you can power it separately. (please keeping mind that you have to use 7V-12V dc power supply as more than 12V DC is not recommended)
Let's write our first code.
The code that we write to Arduino are known as sketches. They are written in C++.
Every sketch needs two void type functions,
Every sketch needs two void type functions,
- void setup()
- void loop()
The void setup() method will run once at the begging as soon as you power up Arduino and the void loop() method will run continuously afterwards.
In void setup() you have to write your initialization steps, and in void loop() you have to write the code that you want to run over and over again.
The basic sketch or program should look like this:

It is
always a good practice to comment your work and you can use "//" double slash for
single line comments or "/*" slash and a star for multi-line comments.
The onboard LED we want to control is connected to pin 13.In order to control that pin we have to create a variable called ledPin (you can use any variable name as you wish) above the setup() method. We need to state our variable before hand, in this case it’s an integer, so we have type int our variable.
Then the ledPin to the output mode command pinMode() which takes two arguments, the first the pin number in this case ledPin, and second, whether it’s an input or output pin. We need to set to OUTPUT.
Note -all Arduino pins can be set to output or input.
We are going to write the command digitalWrite() to our loop(). This also takes two arguments, the pin number and the level HIGH or LOW. (HIGH = ON, LOW=OFF) By default it will be LOW so we will write as HIGH.
Then we make a delay with delay command and give a one second (1000 milliseconds) delay other wise LED will stay on for ever.We have use milliseconds.
Again we will write digitalWrite() and this time have to set as LOW in order to turn off the LED. and 1000 millisecond delay. this will make the LED to ON for one second and OFF for one second.
You can see the code below,

It is always a good practice to comment your work and you can use "//" double slash for single line comments or "/*" slash and a star for multi-line comments.
Compiling and Uploading to Arduino.
After completed the code we have to compile to machine code and upload it to the Arduino. Plug your Arduino UNO board via USB cable into your computer. Now go to the Tools > Serial Port menu and and set your COM port which is assign to Arduino.


You can see the TX and RX lights on-board will flash indicating that the communication is ongoing with PC and Arduino. As soon as uploading complete the LED will start to blink.
By using following code you can create a double blink (Like heart beat)

If you want connect the LED externally to a breadboard you can use the following setup.

That's it, congratulation you have uploaded your first code to Arduino.
Checkout my video tutorial as well,
Checkout my video tutorial as well,
No comments:
Post a Comment